Deploy Supabase to Production
Unless you're self-hosting Supabase, you will need to create an account on Supabase. You can do so by visiting supabase.com.
Once you have created an account, you will need to create a project. You can do so by clicking on the "Create Project" button.
Supabase will promptly create a project and the API Keys required to connect your project to the Supabase API.
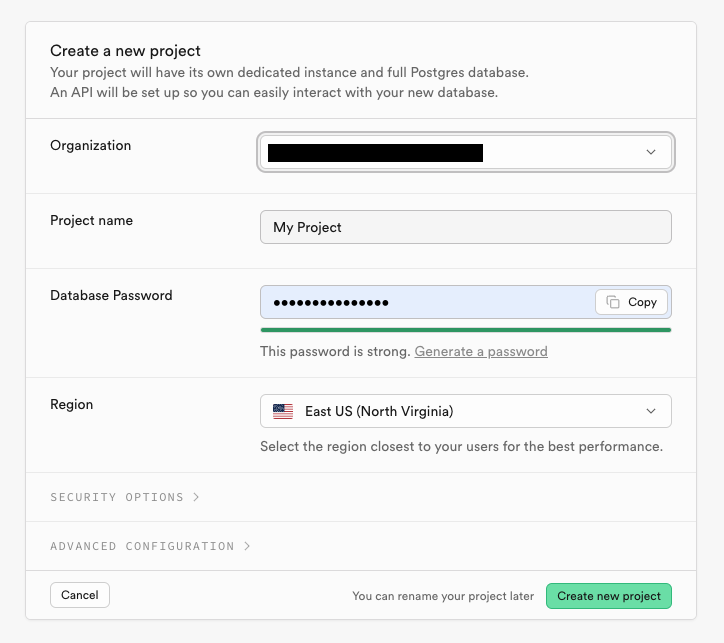
When selecting a region for your Supabase project, it is recommended to choose one geographically proximate to your application's deployment location. For instance, if deploying on Vercel, selecting a region near Vercel's infrastructure (such as North Virginia) will help minimize latency and optimize your application's performance.
You can't change the region once your project is created, so please choose wisely.
Keeping your Supabase Database Password safe
When you create a new Supabase project, Supabase will prompt you to create a Database Password.
Please store the Database Password and keep it safe - you will need it to authenticate your project with the Supabase CLI later on. This password is crucial for database operations and cannot be recovered if lost.
Navigating to the Supabase API settings
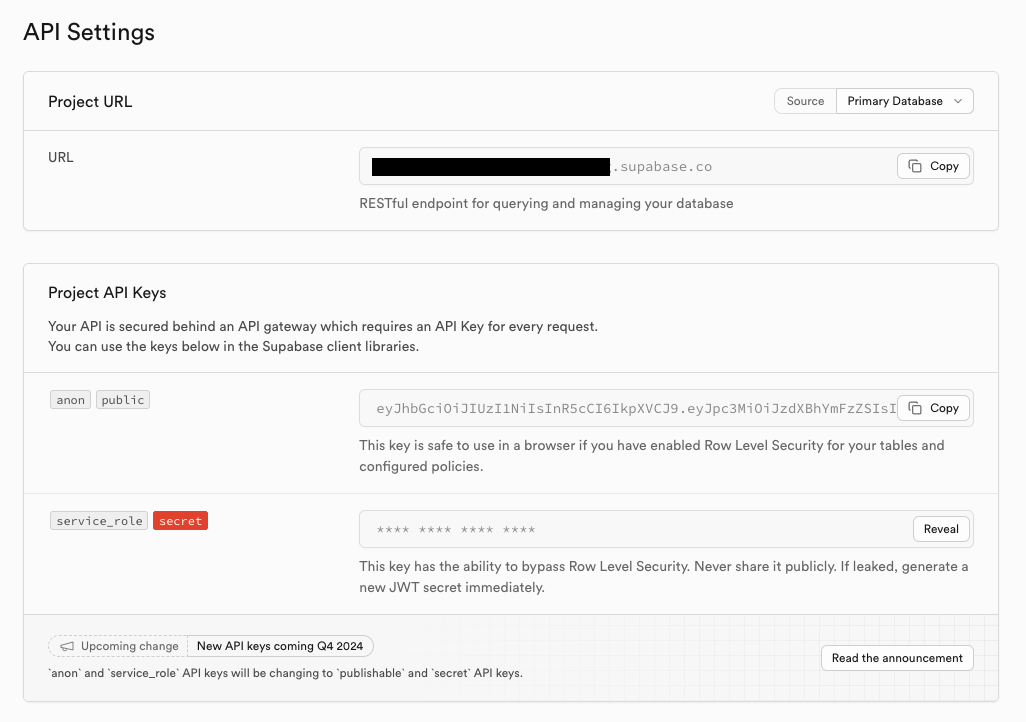
To retrieve the environment variables you will need to retrieve the following:
- Supabase URL: this is the URL of your Supabase project.
- Anon Key: this is the public key of your Supabase project. The client will use it to access your Supabase project.
- Service Role Key: this is the secret key that grants administrative access to your Supabase project.
Navigate to Project Settings -> API to retrieve the Supabase URL, Anon Key, and Service Role Key.
Keep these values safe, you will need them to set up your environment variables. The Service Role Key, in particular, should never be exposed publicly as it grants full administrative access to your project.
Setting up your Supabase Redirect URL
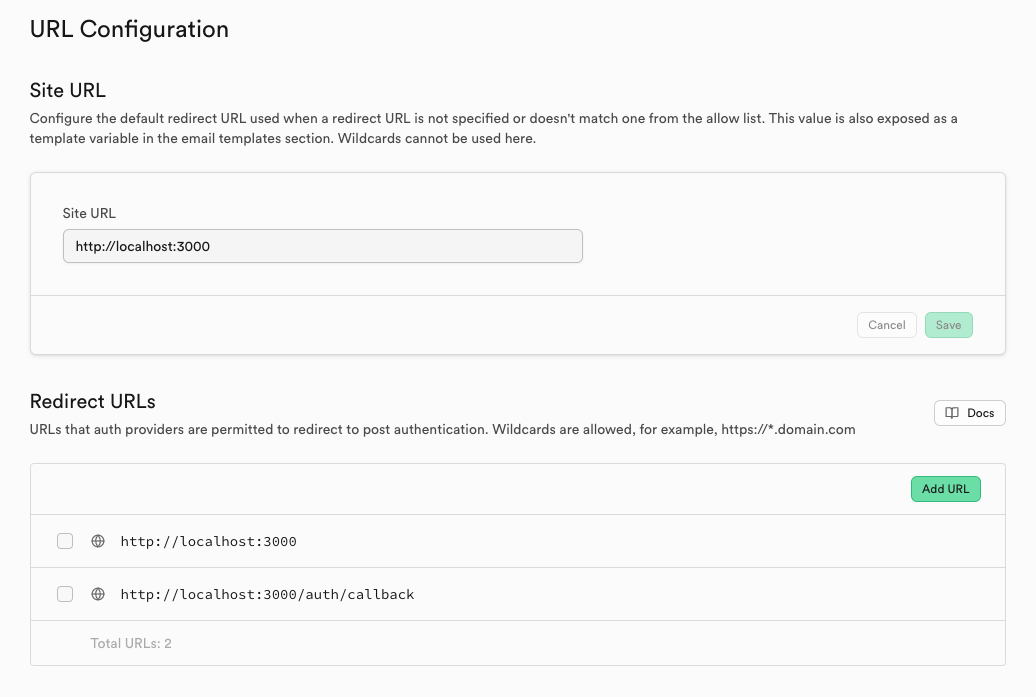
The Redirect URL is the URL that Supabase will redirect the user to after they log in or sign up. This URL should be the URL of your application.
Navigate to Authentication -> URL Configuration to set up the authentication settings.
Please fill the Site URL and Redirect URL fields with your application's URL if you have it.
If you don't yet have a URL (as you may still need to deploy your project), you can fill in the URL later, but remember to update it before you go live with your project.
You can use the following Redirect URL format: https://<your-url>/auth/callback. This is the default endpoint JetShip uses for authentication.
💡 You need to add your domain instead of the example URL.
Setting up Google Auth [Optional]
If you want to use Google Auth in your project, you need to set up Google Auth in your Supabase project.
- Creating a Google Cloud Project
- Setting up OAuth credentials
- Configuring the consent screen
- Adding authorized domains
- Setting up redirect URIs
For detailed instructions, please refer to our OAuth Providers guide.
Setting up your Supabase project SMTP service
If you don't yet have an SMTP service, please skip this step. However - please remember to set up an SMTP service before you go live with your project.
Navigate to Project Settings -> Authentication -> Email -> SMTP Settings to set up your SMTP service.
Enable the SMTP service and fill in the SMTP settings. You can use a service like Resend to set up your SMTP service, which JetShip supports natively.
This is extremely important to ensure that your users receive emails from your application, as Supabase's email service is not reliable and only meant for development purposes.
Setting the Emails in your Supabase project
JetShip provides pre-designed emails that you can use in your Supabase project. You can find the emails in the apps/web/supabase/templates folder in your project.
These emails are nicer than the default Supabase emails and provide a better user experience. We strongly recommend using them in your project.
To update the email templates:
- Navigate to
Authentication->Email Templates - Copy the contents from our template files
- Update the sender name and email address
- Test each template to ensure proper formatting
You may change the Authentication -> Rate Limits -> Rate limit for sending emails number as per your needs.
Setting up Auth Hooks
You need to setup the custom_access_token_hook in the Authentication -> Auth Hooks section.
You will find the custom_access_token_hook in the apps/web/supabase/migrations/20250206054642_schema.sql file.
This allows you to add additional claims based on the authentication method used.
Don't forget to Enable Customize Access Token (JWT) Claims hook in the Authentication -> Auth Hooks section.😉
Linking your Supabase project
Now that you have set up your Supabase project, you need to link it to your project with the Supabase CLI.
To do this, you need to run the following command:
supabase login
Please follow the prompts and login to your Supabase account.
Now, you need to link your project to your Supabase project. To do this, run the following command:
supabase link
You can choose the project you want to link to, and the Supabase CLI will link your project to your Supabase project.
You can check the project available in the Supabase CLI by running the following command:
supabase projects list
The CLI will prompt you for the Database Password you created earlier. Please enter it to authenticate your project with Supabase.
Pushing the Migration to Supabase for production
If you have followed the previous steps, you have linked your project to your Supabase project. Now, you need to push the migration to your Supabase project.
To do this, run the following command:
supabase db push
The Supabase CLI will now ask you to confirm the migrations. If it all looks good (you should see the core migrations and the migration we created for this project) please proceed.
If you want to reset your database, you can do so by running the following command:
supabase db reset --linked
🚀 Congratulations! Your Supabase project is now successfully deployed!