Appearance
🌐 General Settings
The General Settings page is a central place where you can manage several aspects of your application, including its layout, features, and integrations. This page is divided into multiple tabs, each handling different settings, allowing you to customize your application for a seamless user experience.
Application Tab
In this tab, you can configure the core details of your application, such as:
- Site Name: Define the name of your application, which will be displayed across various parts of the platform.
- Support Email: Provide the email address where users can contact support.
- Date Format: Set the format for how dates will appear across your application.
- Date Time Format: Define how both dates and times will be displayed.
- Description: Add a meta description that will be used for your site on pages that do not have a specific description.
💡 Tip: The description you set here will improve your site's SEO for pages with missing descriptions.
Tracking & Cookies Tab
This tab allows you to integrate tracking services like Google Analytics to monitor and analyze traffic to your site.
- Google Tag Manager ID: Enter your Google Tag Manager ID for analytics tracking.
- Tracking: You can add and manage different tracking snippets (e.g., Google Analytics). Add the service name and its respective tracking snippet code to enable it.
- Cookies Consent: Here is the details documentation regarding cookies consent.
💡 Tip: Integrating tracking services like Google Analytics can help you gain insights into user behavior and traffic.
Social Links Tab
Here, you can manage the social media links that appear on your site. For each social platform:
- Title: Specify the name of the social platform (e.g., Facebook, Twitter).
- Icon Name: Choose the corresponding icon for the platform (e.g., tabler-brand-facebook).
- URL: Enter the full URL to your social media page.
You can also add or remove social links as needed.
✨ Best Practice: Ensure all social links are active and pointing to the correct accounts to maintain professionalism.
Pages & Components Tab
This tab allows you to enable or disable certain public-facing pages and features on your site.
- Roadmap Enabled: Toggle this setting to make the Roadmap page visible to the public.
- Blog Enabled: Enable or disable the Blog feature, which controls the visibility of the blog on the public site.
⚠️ Note: You must enable the Blog here to start using any blog-related features.
Share This (Blog) Tab
We’ve integrated the ShareThis third-party service to easily add social sharing buttons to your blog posts. This service supports a wide range of social platforms, allowing users to share your content on their preferred networks.
How to Use
Enable the ShareThis Widget: Toggle the switch to activate or deactivate the ShareThis widget on your blog. When enabled, share buttons will appear on your blog posts, making it easy for users to share content.
Add Share Buttons: You can create as many share buttons as you need, based on the supported platforms. Simply add:
- Title: The name of the social platform (e.g., Facebook, Twitter, Pinterest).
- Icon Name: The corresponding icon name that will represent the platform (e.g., tabler-brand-facebook for Facebook).
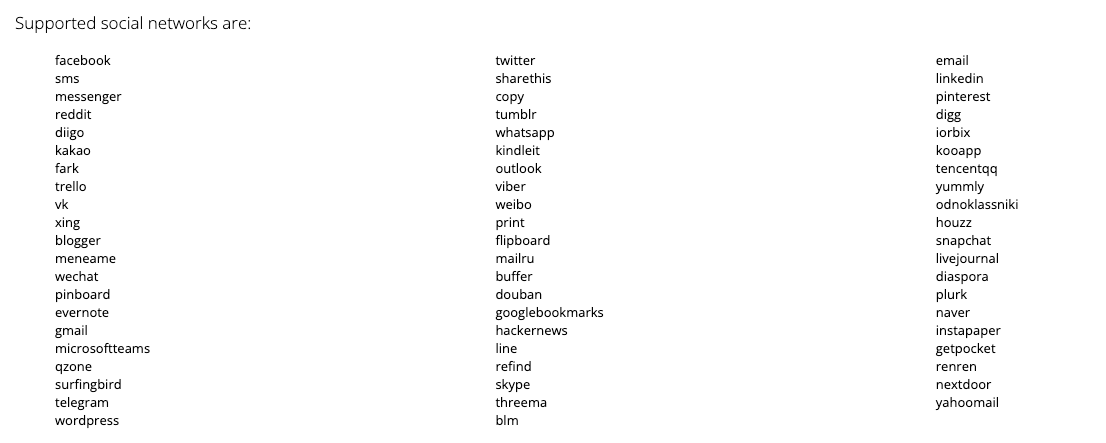
Supported Social Networks
ShareThis supports a wide range of social platforms, including:

For a full list of supported platforms, you can refer to the official ShareThis website. You can choose from this list and add the appropriate share buttons to your blog.
✨ Best Practice: Customize your share buttons based on your audience's most used social platforms to maximize engagement.
reCaptcha Tab
The reCAPTCHA tab allows you to integrate Google's reCAPTCHA for added security, protecting your registration and login forms from spam and abuse.
- reCAPTCHA Enabled: Toggle to enable or disable reCAPTCHA protection.
- reCAPTCHA Site Key: Enter your reCAPTCHA site key provided by Google.
- reCAPTCHA Secret Key: Enter your reCAPTCHA secret key.
⚠️ Note: Ensure both the Site Key and Secret Key are correctly configured to avoid issues with registration or login forms.
Saving Changes
At the bottom of each tab, you’ll find a Save Changes button. Make sure to click it after modifying any settings to ensure your changes are applied.
✨ Best Practice: Always double-check your settings after making changes to avoid configuration errors.