Billing Schema
JetShip uses a type-safe configuration approach for managing billing plans and products. This guide details the schema structure and provides comprehensive examples.
Schema Structure
The billing configuration uses TypeScript types to ensure type safety and proper configuration. Let's break down each type and its purpose:
Billing Config
type PlanVariant = {
  id: string // Unique identifier for the variant (e.g., "pro-monthly")
  name: string // Display name (e.g., "Pro Plan") Shown in the pricing UI
  description?: string // Optional longer description useful for tooltips or detailed views
  paymentType: 'one-off' | 'recurring' // Payment structure: one-off: Single payment (lifetime access) recurring: Subscription (periodic billing)
  features?: string[] // List of features for this variant
  interval?: 'daily' | 'weekly' | 'monthly' | 'yearly' // Defines billing frequency for recurring plans only
  lineItems: {
    priceId: string // Price ID from your payment provider
    name: string // Display name for the line item
    cost: number // Price amount in smallest currency unit
    description?: string // Optional description
  }[]
}

type Plan = {
  id: string // Product ID from your payment provider
  name: string // Product name displayed to customers
  description: string // Detailed product description
  currency: string // ISO currency code (e.g., "USD", "EUR")
  icon?: keyof typeof Icons // Optional icon from react-icons/tb e.g., "TbRocket", "TbUsers"
  badge?: string // Optional badge text e.g., "Most Popular", "Best Value"
  highlighted?: boolean // Whether to highlight this plan in the UI
  couponId?: string // Optional coupon/discount code
  variants: PlanVariant[] // Available variants of this plan
} & (
  | {
      // Subscription Product Configuration
      features: string[] // Features shared across all variants
      variants: (PlanVariant & {
        // Only allows recurring payment variants
        features?: never // Features defined at plan level
        paymentType: 'recurring'
      })[]
    }
  | {
      // One-time Purchase Configuration
      features?: never // No shared features
      variants: (PlanVariant & {
        // Only allows one-off payment variants
        features: string[] | FeatureType[] // Features defined per variant
        paymentType: 'one-off'
      })[]
    }
)
Understanding the billingConfig structure
-
Basic Information
name: The name of your product (e.g., "Basic", "Pro", "Enterprise")description: A brief, compelling description of what customers getcurrency: The currency code for pricing (must match your payment provider)
-
Visual Elements
icon: Icon from react-icons/tb library (e.g., "TbRocket", "TbCloud")badge: Highlight text like "Most Popular" or "Best Value"highlighted: Boolean to visually emphasize important plans
-
Pricing Structure
variants: Array of pricing plans for your product- Each variant includes:
- Price information
- Features list
- Payment type (one-off or recurring)
-
Optional Fields
couponId: Link to discount codes in your payment providerhighlighted: Special visual treatment for featured plans
💡 Important Tips:
- Always match
priceIdwith your payment provider's dashboard - Use clear, marketing-friendly names and descriptions
- Keep feature lists consistent across similar plans
- Consider offering both monthly and yearly options for subscriptions
- Use badges strategically to highlight your best offers
Key Differences: One-off vs Subscription Products
One-off Products
- Single payment for lifetime access
- Features defined per variant
- No recurring billing intervals
- Example use cases:
- Software licenses
- Digital downloads
- Lifetime memberships
Subscription Products
- Recurring payments (monthly/yearly)
- Features shared across variants
- Requires billing interval
- Example use cases:
- SaaS applications
- Membership sites
- Service subscriptions
Configuration Examples
Example: One-off Product
const oneOffProduct: Plan = {
  id: 'prod_1234567890',
  name: 'NextJS Boilerplate',
  description: 'Complete NextJS starter kit with all features',
  currency: 'USD',
  icon: 'TbCode',
  badge: 'Most Popular',
  variants: [
    {
      id: 'boilerplate-basic',
      name: 'Basic License',
      paymentType: 'one-off',
      features: [
        { label: 'Source Code Access', content: true },
        { label: 'Projects', content: 'Unlimited', isLicense: true },
        { label: 'Support Duration', content: '6 months', isLicense: true }
      ],
      lineItems: [
        {
          priceId: 'price_1234',
          name: 'Basic License',
          cost: 99,
          description: '$99 one-time payment'
        }
      ]
    }
  ]
}
Example: Subscription Product
const subscriptionProduct: Plan = {
  id: 'prod_1234567890',
  name: 'SaaS Platform',
  description: 'Scalable SaaS solution for your business',
  currency: 'USD',
  icon: 'TbCloud',
  features: [
    { label: 'API Access', content: true },
    { label: 'Storage', content: '10 GB' },
    { label: 'Support', content: '24/7' }
  ],
  variants: [
    {
      id: 'saas-monthly',
      name: 'Monthly Plan',
      paymentType: 'recurring',
      interval: 'monthly',
      lineItems: [
        {
          priceId: 'price_1234',
          name: 'Monthly Subscription',
          cost: 29,
          description: '$29 billed monthly'
        }
      ]
    },
    {
      id: 'saas-yearly',
      name: 'Yearly Plan',
      paymentType: 'recurring',
      interval: 'yearly',
      lineItems: [
        {
          priceId: 'price_1234',
          name: 'Yearly Subscription',
          cost: 290,
          description: '$290 billed yearly (save 17%)'
        }
      ]
    }
  ]
}
Pricing Table
The pricing table is a component that displays the pricing plans for your product. It is a table that displays the name, description, and price of each plan.
You may refer to the Pricing Component documentation for more information.
Configuration Workflow and Examples
Setting Up Products
Here's a step-by-step workflow for configuring your products:
-
Create Products in Payment Provider
- Log into your payment provider's dashboard (Stripe or LemonSqueezy)
- Create your product with all necessary details
- Set up pricing plans (one-time or subscription)
- Note down the product and price IDs
-
Configure in JetShip
- Use the IDs from your payment provider
- Configure the billing schema
- Test the integration
JSON Configuration Example
Here's how to structure your billing configuration:
const plans: Plan[] = [
  {
    id: 'prod_1234567890', // Product ID from your payment provider
    name: 'Pro Plan',
    description: 'Pro version with advanced features',
    currency: 'USD',
    icon: 'TbRocket',
    badge: 'Most Popular',
    highlighted: true,
    features: [
      // Shared features for subscription plans
      { label: 'Advanced Feature 1', content: true },
      { label: 'Advanced Feature 2', content: true },
      { label: 'Priority Support', content: '24/7' },
      { label: 'API Access', content: true }
    ],
    variants: [
      {
        id: 'pro-monthly',
        name: 'Monthly Pro',
        paymentType: 'recurring',
        interval: 'monthly',
        lineItems: [
          {
            priceId: 'price_monthly_xxxxx', // Price ID from your payment provider
            name: 'Pro Monthly',
            cost: 49,
            description: '$49/month'
          }
        ]
      },
      {
        id: 'pro-yearly',
        name: 'Yearly Pro',
        paymentType: 'recurring',
        interval: 'yearly',
        lineItems: [
          {
            priceId: 'price_yearly_xxxxx', // Price ID from your payment provider
            name: 'Pro Yearly',
            cost: 499,
            description: '$499/year (save 15%)'
          }
        ]
      }
    ]
  }
]
Why Manual Product Creation is Required
-
Separation of Concerns: JetShip does not interact directly with the payment provider’s product creation APIs. This ensures that product creation and management remain within the dedicated payment provider’s dashboard, allowing you to keep full control over your pricing, discounts, and other product-related information.
-
Security and Flexibility: By manually managing products in your payment provider’s dashboard, you retain flexibility and can take advantage of the provider’s pricing rules, discounts, and coupons.
💡 Important Tips: Always double-check the
price_idandproduct_idyou enter into your JSON to ensure that the correct pricing details are displayed to your customers.
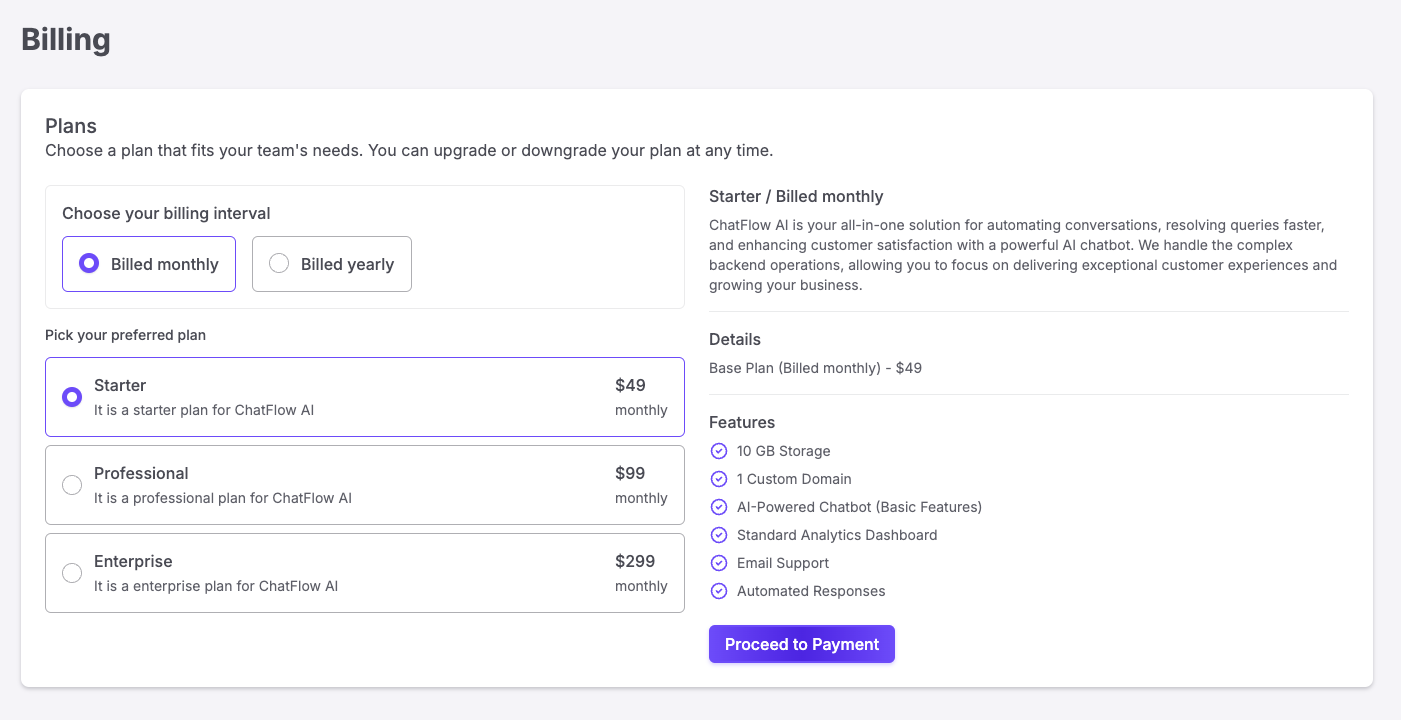
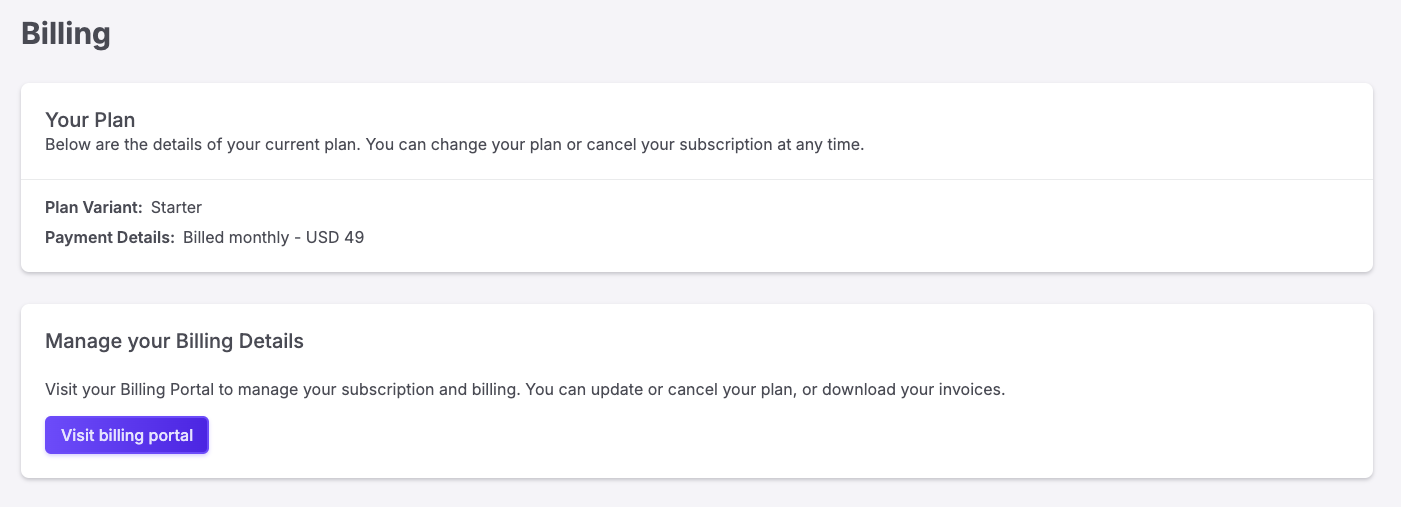
Billing in the User Dashboard
The Billing section in the User Dashboard allows customers to manage their purchases. Users can:
- View active subscriptions and one-time purchases.
- Access the customer portal to manage payment methods, update billing details, or cancel subscriptions.
Billing Page Example
Customer Portal Example
Testing Your Integration
Before going live:
- Test with provider test keys
- Verify webhook functionality
- Test all payment scenarios
- Validate error handling
- Check email notifications
- Test customer portal features