Appearance
Payment Providers Overview
In JetShip, you have the flexibility to choose and configure your payment provider for processing transactions. JetShip integrates two powerful payment providers:
- Stripe (Default)
- LemonSqueezy
Only one payment provider can be active at a time. By default, Stripe is selected, but you can easily switch to LemonSqueezy through the admin panel if needed.
Choosing a Payment Provider
When selecting a payment provider, consider the following factors:
- Charges: Compare the transaction fees between Stripe and LemonSqueezy.
- Supported Countries: Make sure the provider operates in the countries where your customers are located.
- Supported Currencies: Check if your preferred currency is supported by the payment provider.
- Payment Methods: Each provider supports different payment methods (e.g., credit cards, wallets, bank transfers).
- Payout Time: Understand how long it takes for the provider to transfer funds to your account.
- Refund Processing: Consider how long it takes for refunds to be processed.
- Dispute Resolution: Investigate how the provider handles payment disputes and the level of support they offer.
💡 Tip: Before going live, it is advisable to create a test account for each payment provider. This allows you to familiarize yourself with the payment flow, set up test products, and simulate transactions.
Note
If you're looking to set up an affiliate program for your product, consider using LemonSqueezy, as it offers a built-in affiliate system. Additionally, if your product is downloadable, such as a tutorial PDF, LemonSqueezy allows users to access their downloads immediately after payment is confirmed. These features are not available with Stripe, which requires manual handling for both affiliate management and digital product delivery.
Configuring Payment Providers in JetShip
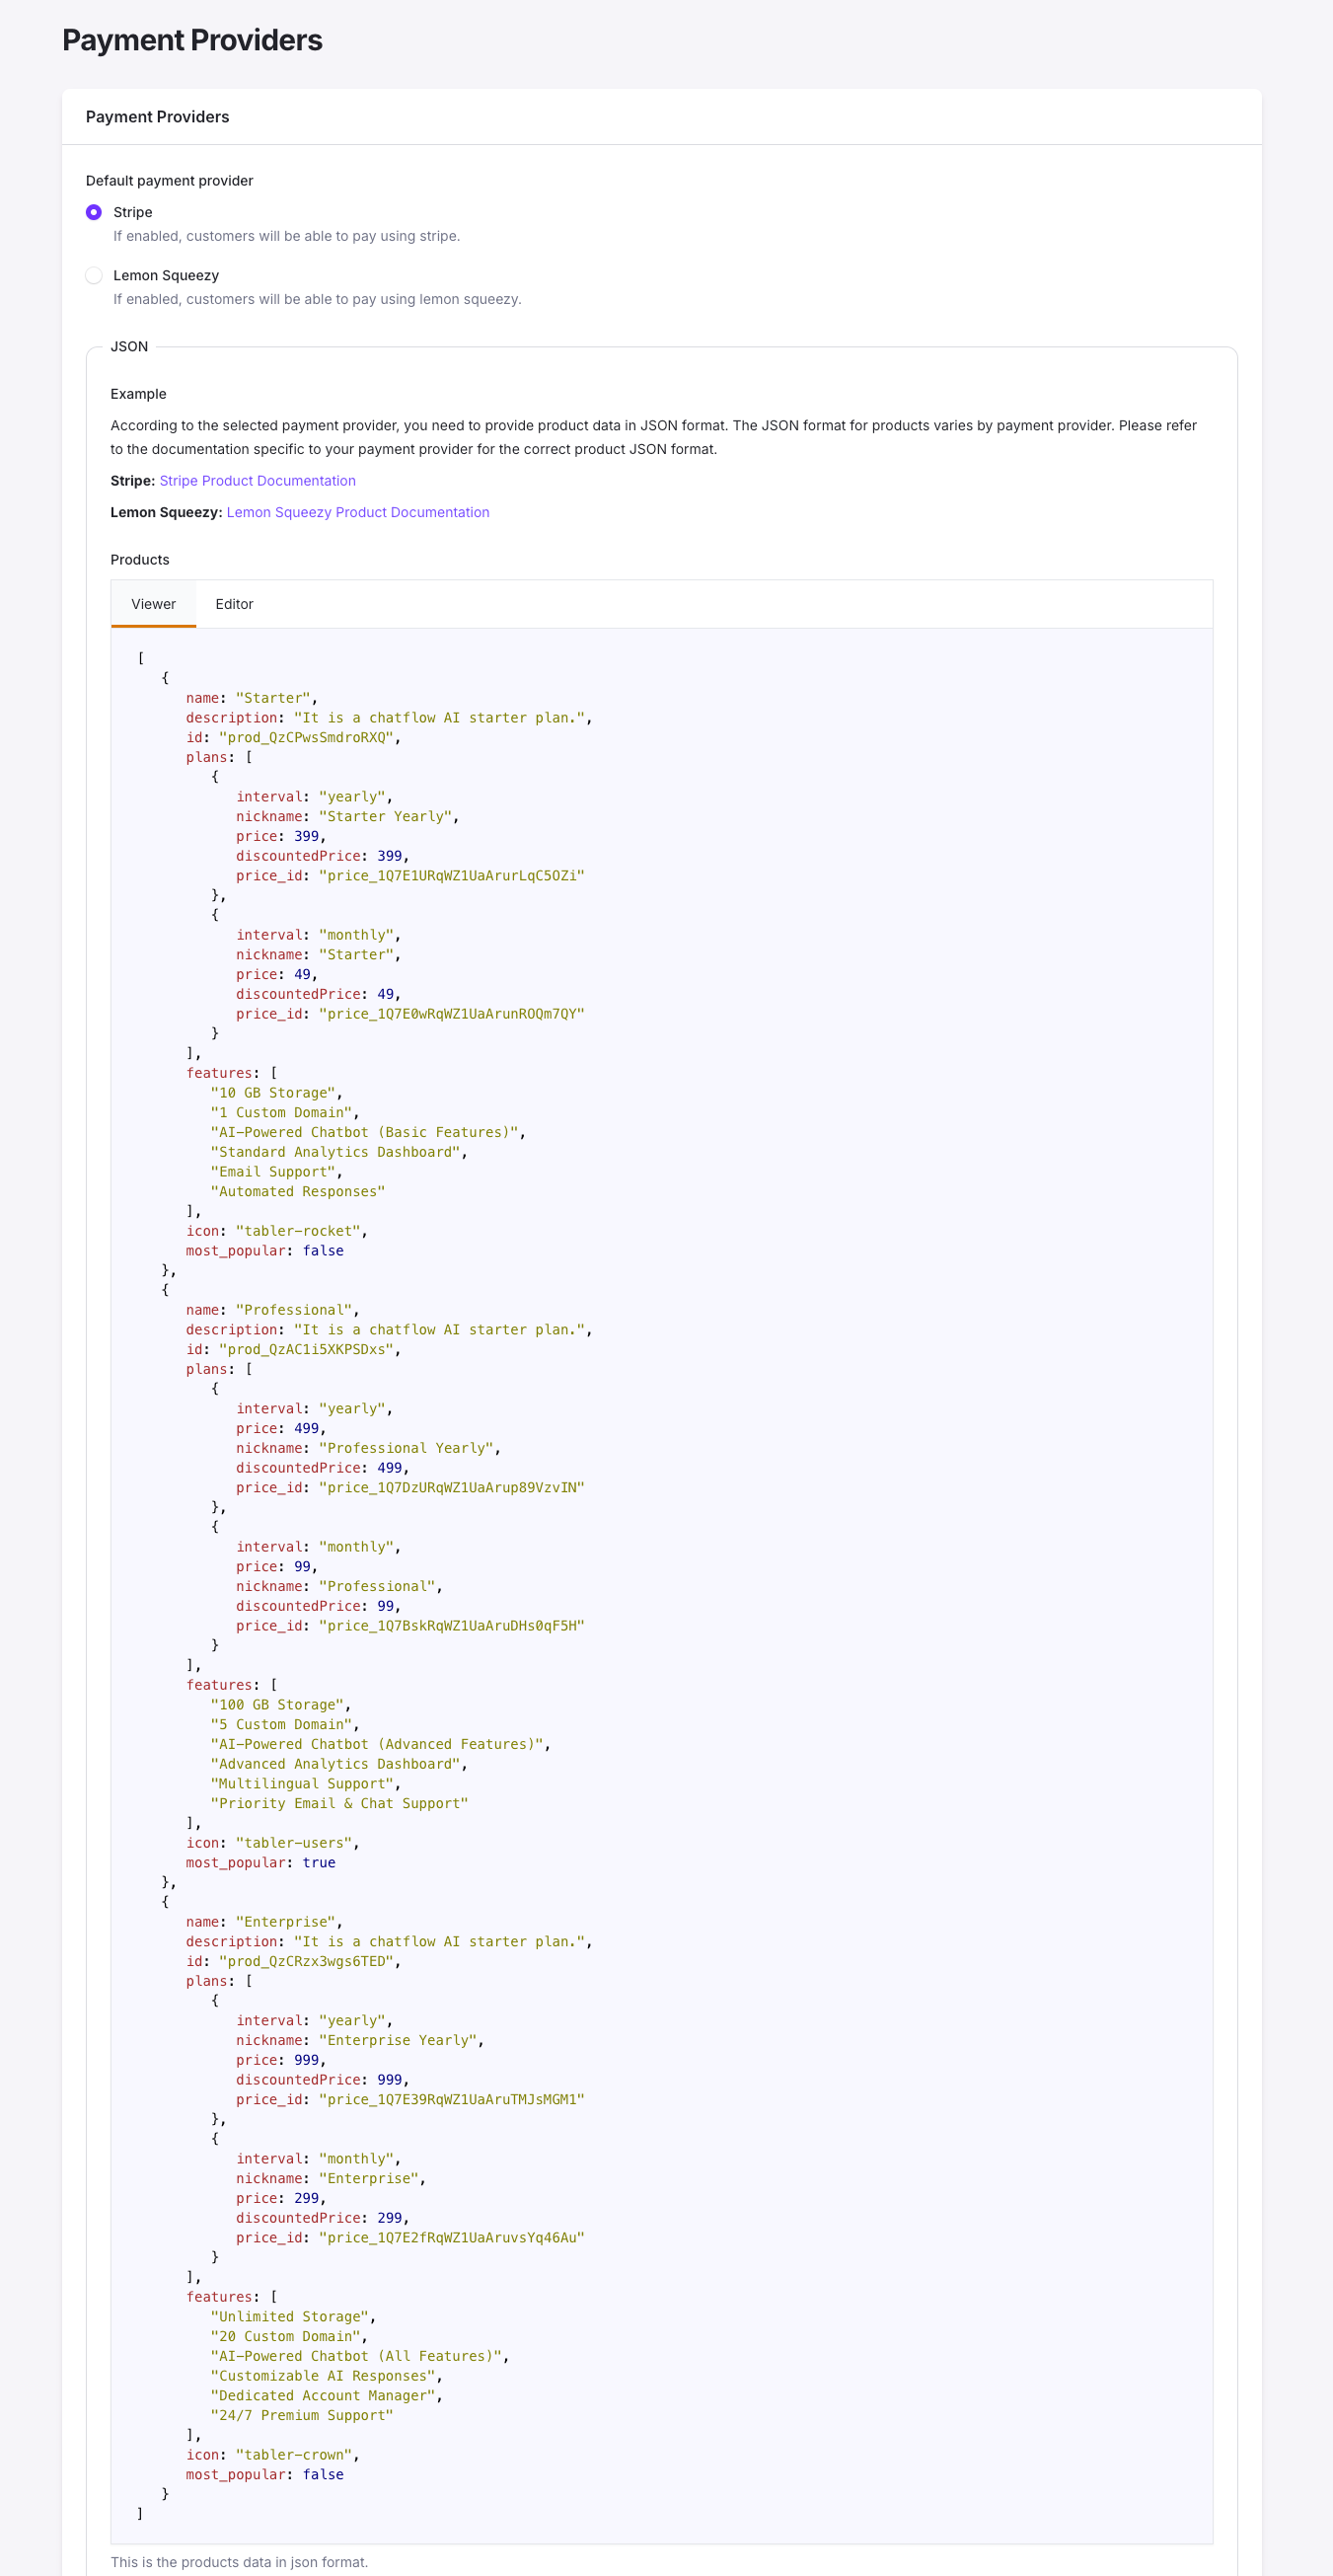
JetShip provides a simple and flexible way to configure payment providers through the Payment Providers page in the admin panel. Each payment provider requires product data in JSON format to render pricing tables and generate checkout URLs.
Payment Providers JSON Configuration
The JSON format is required to define the products, prices, and features for both Stripe and LemonSqueezy. Depending on your use case, you will need to format your JSON appropriately for:
- LemonSqueezy One-Off Products
- LemonSqueezy Subscription Products
- Stripe One-Off Products
- Stripe Subscription Products
These formats have minor differences, but they follow a general structure. Here's a breakdown of the configuration process.
JSON Configuration
LemonSqueezy One-Off Product Example
json
[
  {
    "name": "One Time Product",
    "description": "This is a one-time product. Multiple price variants are available.",
    "oneoff": true,
    "plans": [
      {
        "name": "Basic",
        "price": 99,
        "discountedPrice": 99,
        "price_id": "430764", // Variant ID
        "description": "Basic license",
        "icon": "tabler-rocket",
        "most_popular": false,
        "features": [
          "feature1",
          "feature2",
          "feature3"
        ]
      },
      {
        "name": "Pro",
        "price": 199,
        "discountedPrice": 199,
        "price_id": "430767",
        "description": "Pro license",
        "icon": "tabler-users",
        "most_popular": true,
        "features": [
          "feature1",
          "feature2",
          "feature3"
        ]
      }
    ],
    "coupon_id": "I4ODK0MQ"
  }
]
Stripe Subscription Product Example
json
[
  {
    "name": "Basic",
    "description": "It is a basic JetShip plan with two subscription intervals: yearly and monthly.",
    "id": "prod_QMXg3yaqmyrVC8",
    "plans": [
      {
        "interval": "yearly",
        "nickname": "JetShip Yearly",
        "price": 399,
        "discountedPrice": 399,
        "price_id": "price_XXXXXX"
      },
      {
        "interval": "monthly",
        "nickname": "JetShip Monthly",
        "price": 39,
        "discountedPrice": 39,
        "price_id": "price_XXXXXX"
      }
    ],
    "features": [
      "feature1",
      "feature2",
      "feature3"
    ],
    "icon": "tabler-rocket",
    "most_popular": false,
    "coupon_id": "LP2Whte4"
  }
]
⚠️ Note: JSON does not support comments. The comments shown in the above examples (//) are for explanation purposes only and should be removed before use.
Understanding the JSON Structure
name: The name of the product (e.g., Basic, Pro).description: A brief description of the product.oneoff: A boolean value (trueorfalse) indicating if the product is a one-time purchase.plans: A list of product pricing plans, including details likeprice,discountedPrice, andprice_id.features: A list of key product features.coupon_id: Optional field for specifying discounts.
💡 Tip: Be sure to match the price_id with the value from your payment provider’s dashboard (Stripe or LemonSqueezy).
JSON Editor in the Admin Panel
The Payment Providers page includes a JSON editor with two modes:
- Viewer Mode: Allows you to review the current JSON configuration.
- Editor Mode: Lets you modify or input new product configurations.
After updating the JSON, always click Save Changes to ensure that your changes are applied and reflected in the pricing tables and checkout flow.
Important Note on Payment Provider JSON
The JSON configuration used in the Payment Providers section of JetShip is only for rendering the pricing components on your application’s front end. It helps display the correct products, pricing, and features, but it does not automatically create products in your chosen payment provider (Stripe or LemonSqueezy).
Key Points
- Manual Product Creation: Before using the JSON configuration in JetShip, you must manually create your products and pricing details in your payment provider’s dashboard (Stripe or LemonSqueezy).
- Matching Price IDs: After creating products in your payment provider, retrieve the appropriate
price_idandproduct_idfrom the provider’s dashboard and include them in the JSON. This ensures that the correct pricing is rendered and linked to the proper checkout process.
For example:
- In Stripe, you will create a product and obtain the
price_idto include in your JetShip JSON. - In LemonSqueezy, you will similarly create the product and copy the relevant variant or price_id.
JSON Configuration Example
Here’s a simple workflow to follow:
- Create the Product: Log into your payment provider's dashboard (e.g., Stripe, LemonSqueezy) and manually create the product, including the pricing details and any subscription plans.
- Retrieve the Price/Product IDs: Once the product is created, get the corresponding
price_idorproduct_idfrom the provider. - Configure the JSON: Add the retrieved
price_idandproduct_idinto your JetShip JSON configuration, like this:
json
[
  {
    "name": "Pro Plan",
    "description": "Pro version with advanced features.",
    "plans": [
      {
        "interval": "monthly",
        "price": 49,
        "discountedPrice": 49,
        "price_id": "price_1XXXXXXRXXXXXX"
      },
      {
        "interval": "yearly",
        "price": 499,
        "discountedPrice": 499,
        "price_id": "price_1XXXXXXRXXXXXX"
      }
    ],
    "features": [
      "Advanced Feature 1",
      "Advanced Feature 2"
    ],
    "icon": "tabler-rocket",
    "most_popular": true,
    "coupon_id": "DISCOUNT123"
  }
]
Why Manual Creation is Required
- Separation of Concerns: JetShip does not interact directly with the payment provider’s product creation APIs. This ensures that product creation and management remain within the dedicated payment provider’s dashboard, allowing you to keep full control over your pricing, discounts, and other product-related information.
- Security and Flexibility: By manually managing products in your payment provider’s dashboard, you retain flexibility and can take advantage of the provider’s pricing rules, discounts, and coupons.
💡 Tip: Always double-check the price_id and product_id you enter into your JSON to ensure that the correct pricing details are displayed to your customers.
Recap
- First: Manually create the product and pricing in your payment provider (Stripe or LemonSqueezy).
- Second: Retrieve the
price_idand other identifiers. - Third: Input these values into JetShip’s JSON configuration to properly render the product and pricing tables.
By following this process, you ensure that your payment workflow is accurately linked between JetShip and your payment provider, providing a seamless user experience for pricing and checkout.
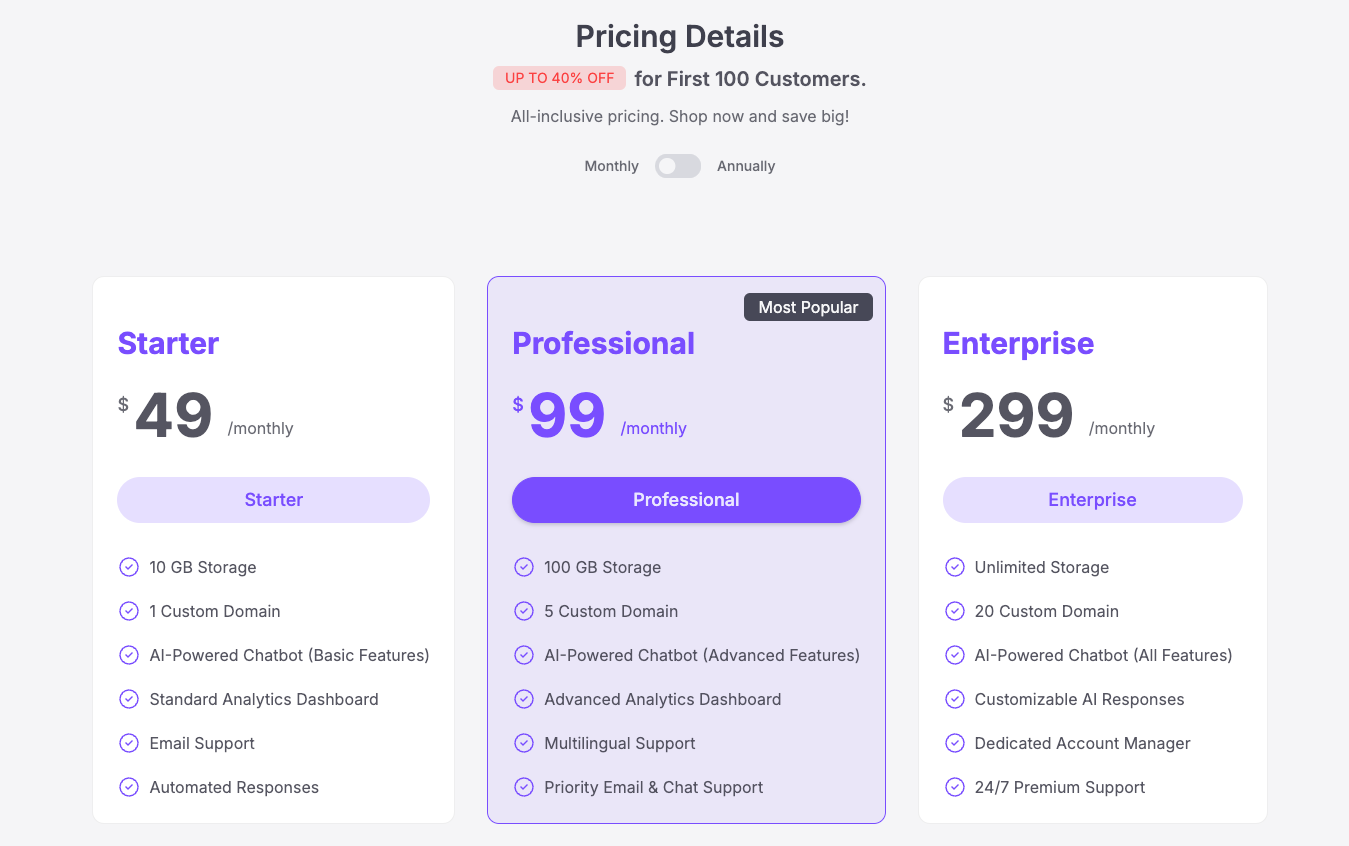
Pricing Tables
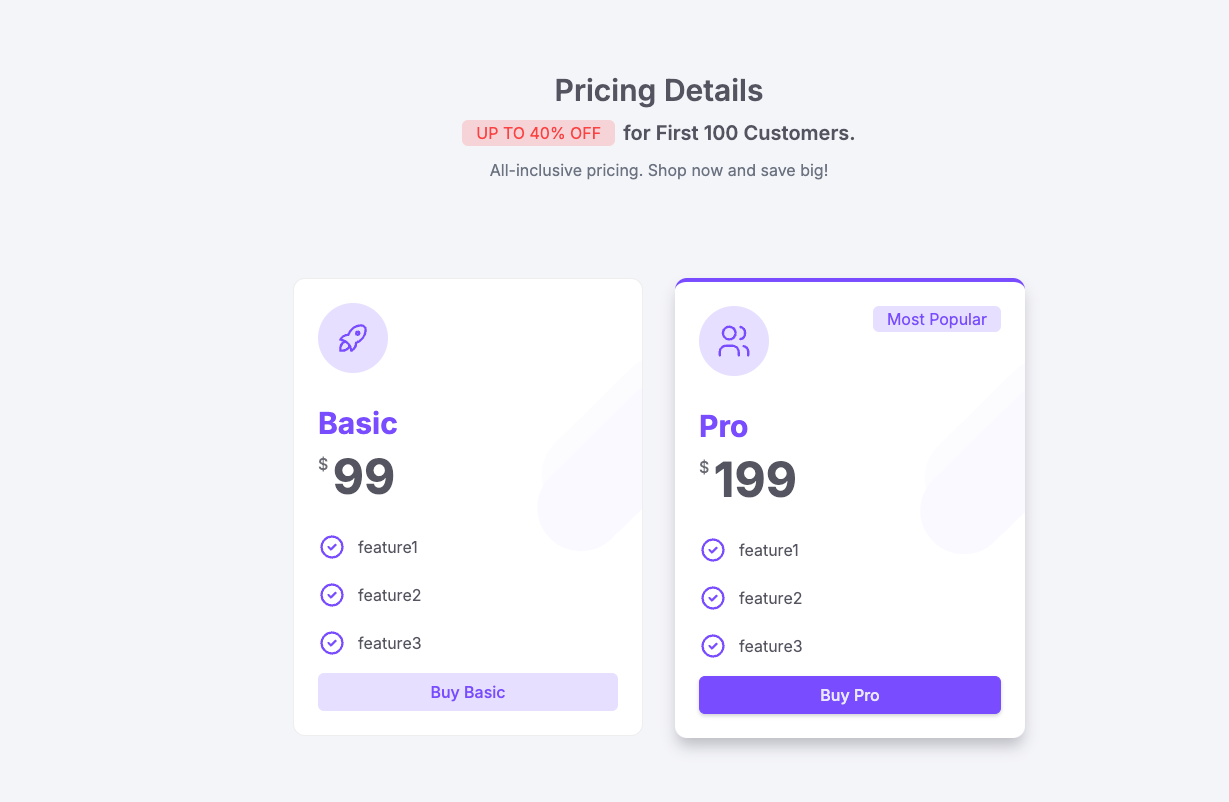
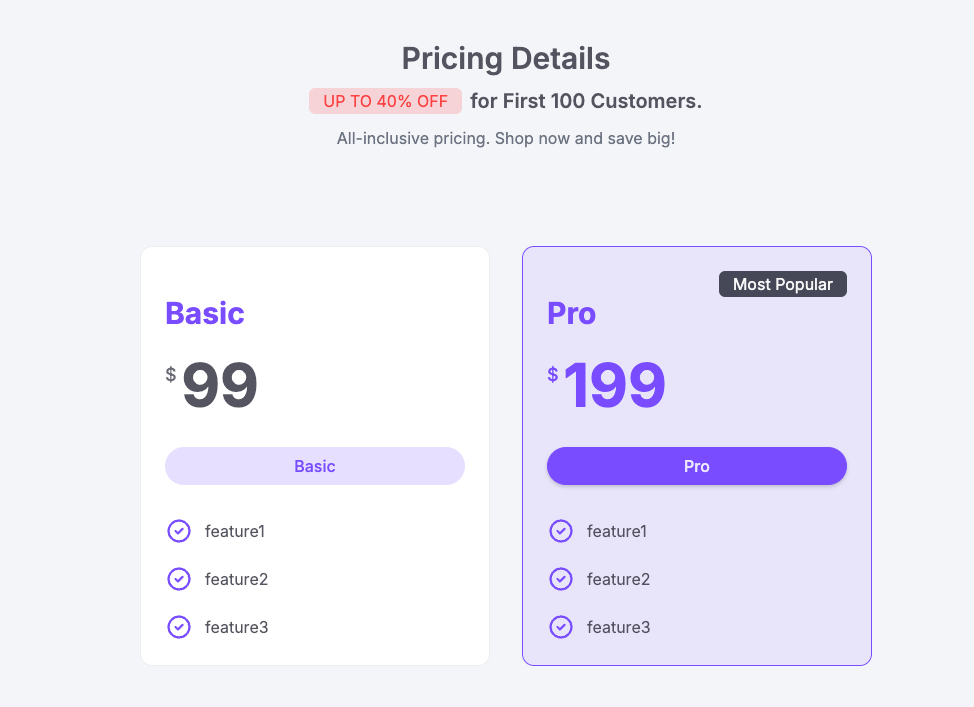
One-Off Pricing Tables
JetShip supports multiple versions of one-off product pricing tables. Below are two different table designs:
Pricing One-off
Pricing One-off Outlined
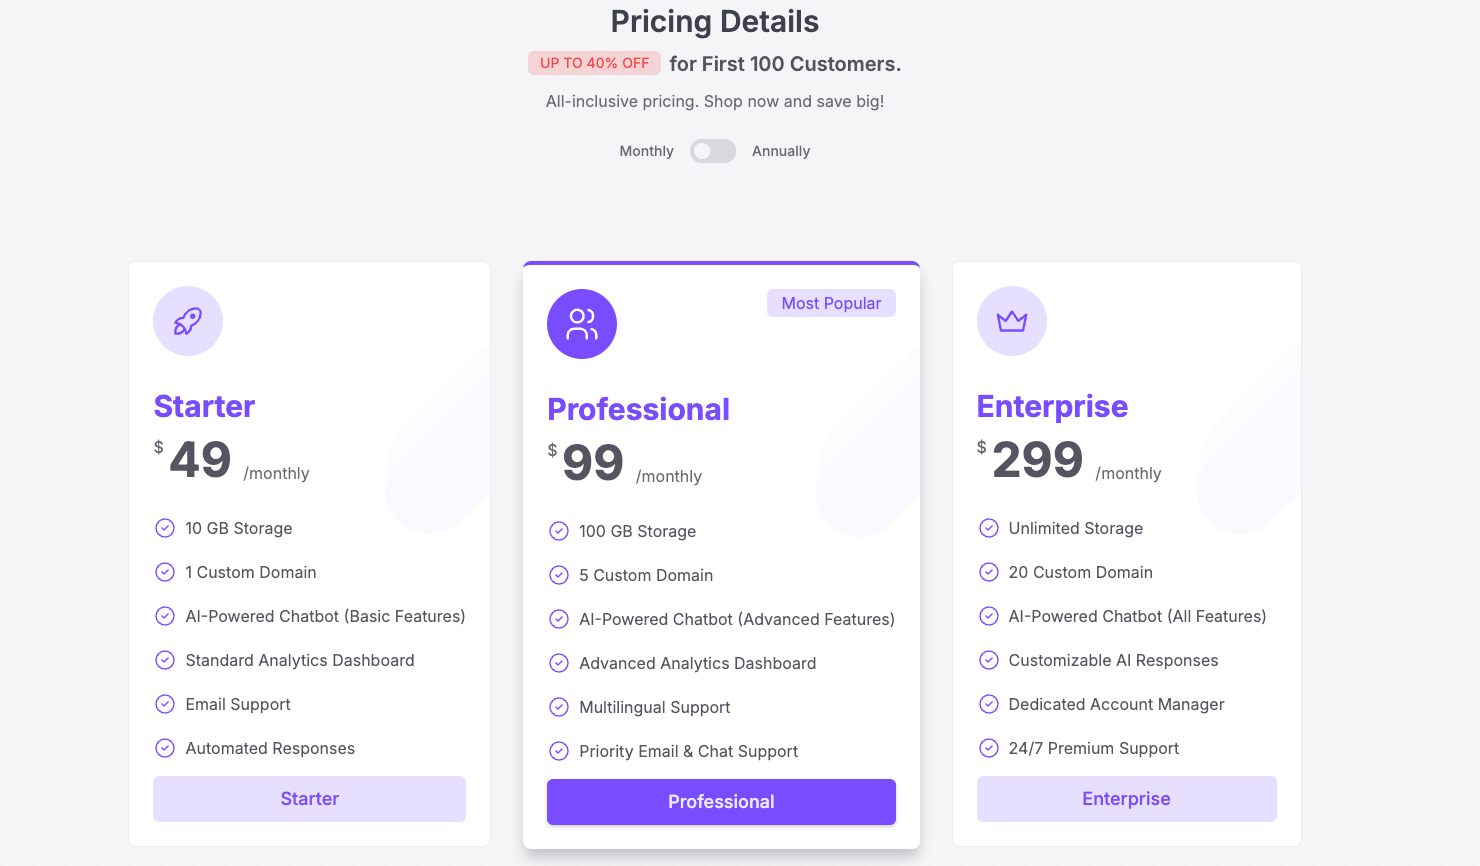
Subscription Pricing Tables
Subscription products also come with different pricing table designs:
Pricing Subscription
Pricing Subscription Outlined
Switching Payment Providers
⚠️ Warning: It is not recommended to switch payment providers after your product is live because it can lead to the following issues:
- You will need to recreate all products, prices, and discounts in the new payment provider.
- Customers will have to re-enter their payment details.
- You may lose historical payment and subscription data.
- Users will need to switch to a new customer portal.
- The migration process can be complex and time-consuming.
If you must switch payment providers, follow these steps:
- Update the payment provider settings in your
.envfile. - Reconfigure the payment provider in the admin panel.
- Notify your users about the change and provide instructions for updating their payment information.
- Update the customer portal links.
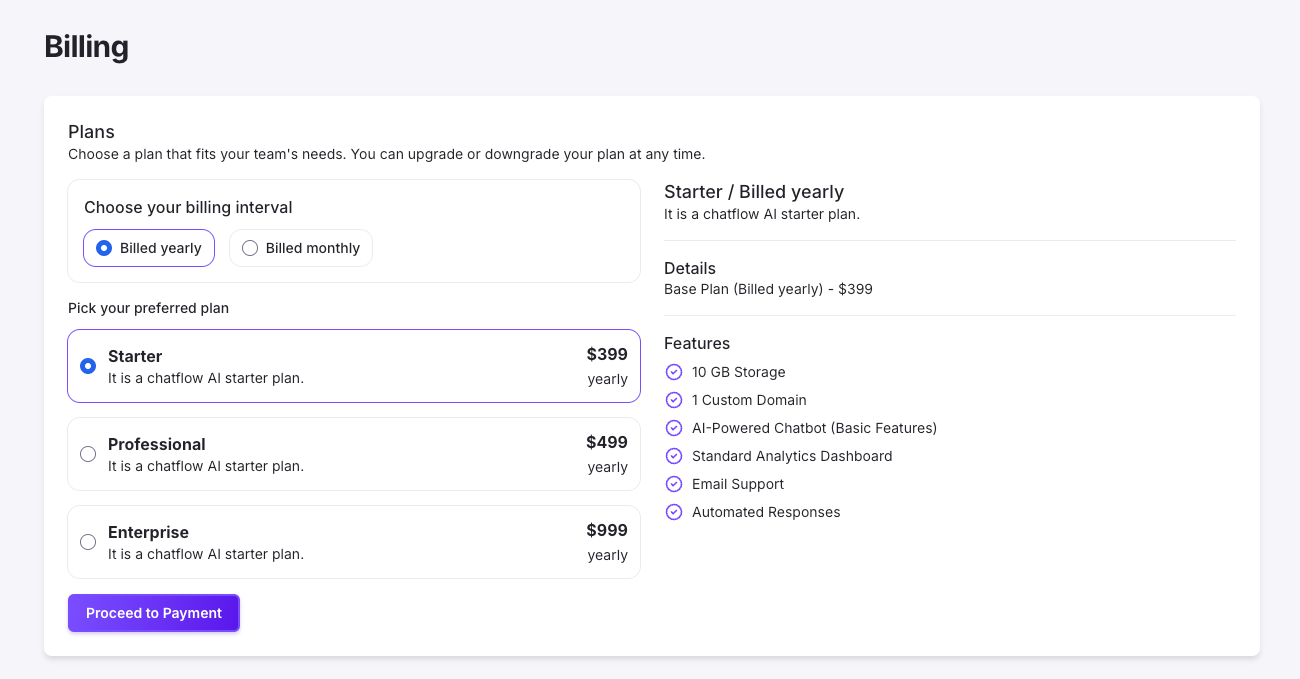
Billing in the User Dashboard
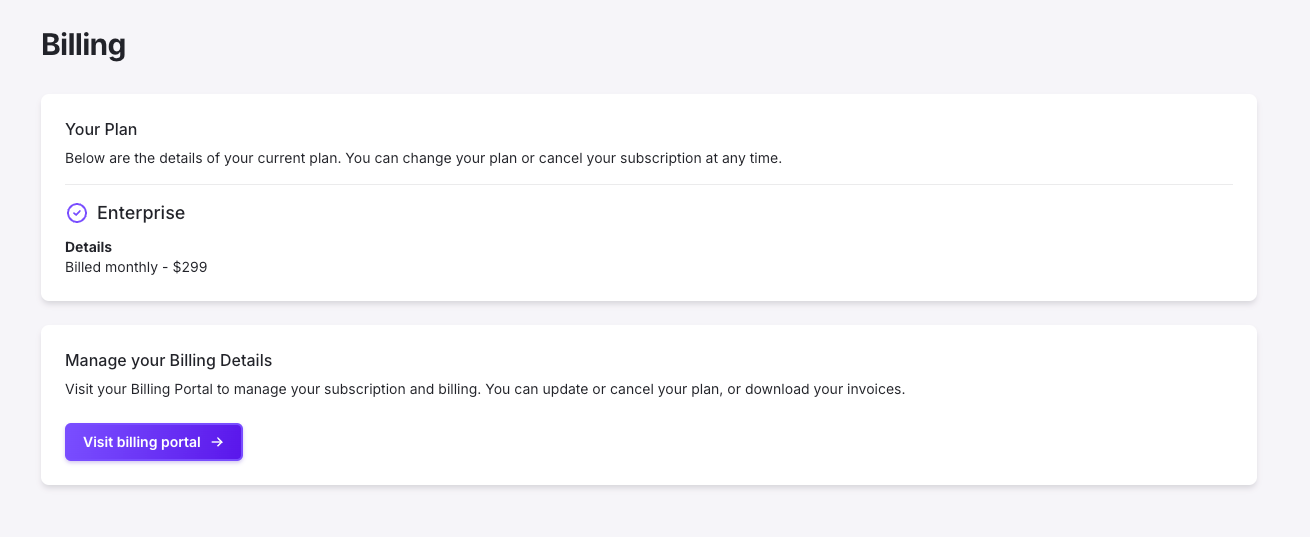
The Billing section in the User Dashboard allows customers to manage their purchases. Users can:
- View active subscriptions and one-time purchases.
- Access the customer portal to manage payment methods, update billing details, or cancel subscriptions.
Billing Page Example
Customer Portal Example
Conclusion
JetShip provides a flexible payment configuration system, supporting both Stripe and LemonSqueezy for one-time purchases and subscriptions. Using the JSON editor, you can easily configure products, prices, and features. Make sure to carefully review and test your setup before going live.
By following the guidelines in this documentation, you can efficiently manage your payment provider configuration and provide a seamless purchasing experience for your users.